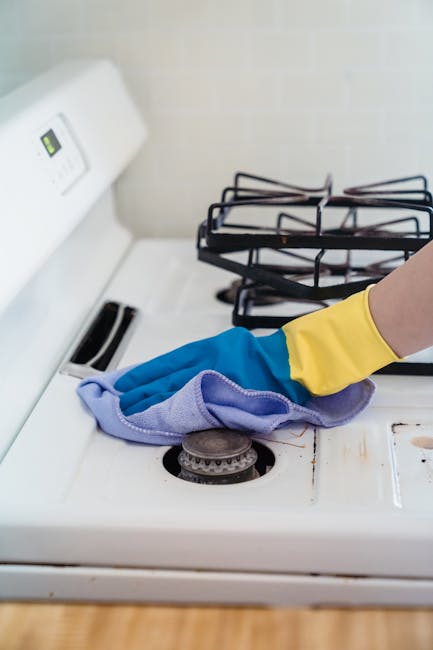
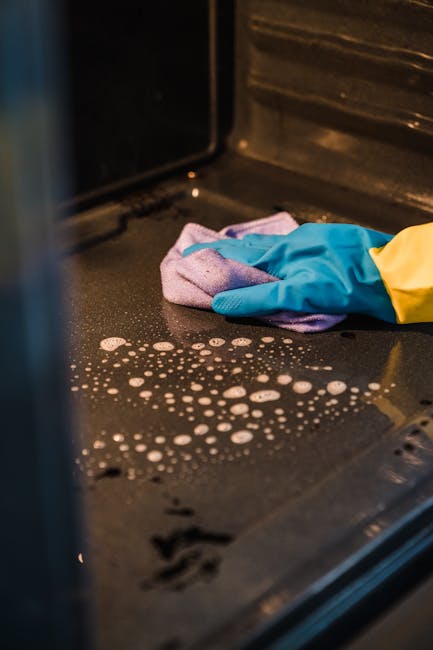
Pro guide to removing baked on oven grease with safe cleaning methods
If you have ever opened the oven door, seen that dark, sticky layer of grease, and thought, "Right, that is not coming off today," you are in good company. Baked-on oven grease is one of those cleaning jobs that looks simple from a distance and then quietly turns into a stubborn, smoky mess the moment the oven heats up. This pro guide to removing baked on oven grease with safe cleaning methods walks you through what actually works, what to avoid, and how to clean in a way that protects both your oven and your lungs.
Whether you are dealing with a home kitchen after months of roasts, a rental property that needs to pass a check-out clean, or just a cooker that has seen better days, the key is the same: remove the grease safely, patiently, and without wrecking the finish. Let's get into it properly.
Why Pro guide to removing baked on oven grease with safe cleaning methods Matters
Baked-on grease is not just a cosmetic problem. Once grease and food residue cook onto the walls, floor, racks, and glass, they become harder to shift and more likely to smoke or smell when the oven is on. That smell usually starts as a faint burnt note, then becomes that unmistakable "something is definitely burning" smell about ten minutes into preheating. Not ideal, to put it mildly.
There is also a practical side. Heavy grease build-up can make it harder to judge how clean the oven really is, and in some cases it can affect airflow around fans or vents. For landlords, tenants, and anyone preparing a kitchen for sale or inspection, a greasy oven can drag down the whole room. For busy households, it just makes cooking less pleasant. Truth be told, nobody wants roast potatoes tasting faintly of last week's lasagne.
Safe methods matter because oven interiors are not all built the same. Some have enamel coatings, catalytic liners, or self-cleaning features that can be damaged by harsh abrasives, strong chemicals, or metal scourers. The right approach removes grime without scratching the surface, leaving no harsh residue behind.
If your kitchen is part of a broader deep clean, it can make sense to look at related areas too, such as kitchen cleaning or a more general deep cleaning service when the grease problem is part of a bigger reset. That is especially useful after events, moves, or a long stretch of everyday cooking.
How Pro guide to removing baked on oven grease with safe cleaning methods Works
The process is straightforward in theory. Grease is made of fats and oils, and once those are repeatedly heated, they oxidise, harden, and cling to surfaces. Heat alone will not "burn it off" in a useful way; it often just bakes it further. The goal is to soften the residue first, then break it down gently enough that it can be wiped or lifted away.
Safe cleaning methods work in a few stages:
- Loosen the build-up with heat, steam, or a mild alkaline cleaner.
- Break the bond between grease and the oven surface using dwell time.
- Lift residue with non-scratch tools and absorbent cloths.
- Rinse or neutralise any cleaner left behind so it does not smoke later.
- Dry thoroughly before reheating the oven.
That dwell time is the unsung hero. People often spray, scrub for thirty seconds, and decide the product is useless. Usually it is not the product. It is the lack of patience. In our experience, letting a safe cleaner sit for the right amount of time makes a bigger difference than scrubbing harder ever will.
There are also different surfaces involved. Flat enamel walls, glass doors, fan covers, racks, and trays each respond differently. What works beautifully on a removable rack may be too aggressive for the oven window seal. So the real skill here is matching the method to the surface.
Key Benefits and Practical Advantages
Using safe cleaning methods for baked-on oven grease is not just about avoiding damage. It gives you better results with less drama. And honestly, less drama is underrated in kitchen cleaning.
- Less risk of scratches or coating damage on enamel and glass.
- Reduced smoke and odour during cooking, especially at higher temperatures.
- Cleaner-looking kitchen presentation for guests, inspections, or photography.
- More consistent cooking conditions because residue is not interfering with surfaces and airflow.
- Safer handling compared with overusing harsh chemicals in a confined space.
- Better long-term maintenance because regular safe cleaning prevents heavy build-up.
There is a small but real money angle too. A well-maintained oven is less likely to need a rescue clean or replacement parts sooner than necessary. And if you are renting, moving out, or managing a property, a properly cleaned oven can be one of those little details that saves a lot of back-and-forth later.
Expert summary: The best oven grease removal method is rarely the most aggressive one. Gentle, repeated action with the right dwell time tends to outperform harsh scrubbing, and it protects the finish while still tackling the grime.
Who This Is For and When It Makes Sense
This guide is for anyone who has looked into an oven and realised the grease layer is now officially "baked in." That might be a family kitchen after months of weeknight cooking, a student flat with a well-used oven, or a landlord preparing for an end-of-tenancy handover.
It also makes sense if you are:
- trying to clean an oven without strong fumes
- worried about damaging self-cleaning or coated interiors
- dealing with burnt-on splatter behind the grill element
- trying to get the oven presentable before guests arrive
- managing a busy household and need a practical, repeatable routine
Sometimes the issue is not that the oven is disastrous. It is that a few greasy spots have accumulated in awkward places, and every time you use the oven they get just a little more stubborn. That is when safe, targeted cleaning is much better than an all-out assault with whatever bottle is nearest the sink.
If the job is part of a larger home refresh, pairing it with house cleaning or home cleaning can make sense, especially if you want the kitchen to feel genuinely reset rather than just superficially wiped over.
Step-by-Step Guidance
Below is a practical approach that balances effectiveness and safety. It is designed for typical domestic ovens, but always check your manufacturer guidance first if your oven has unusual finishes or features.
1) Switch the oven off and let it cool fully
This sounds obvious, but it matters. You want the oven warm enough only if your chosen cleaner specifically benefits from it. Never start with a hot cavity. Give it time. A cool oven is safer, and cleaners behave more predictably on cool or slightly warm surfaces.
2) Remove loose debris
Take out crumbs, baking bits, and anything dry that will get in the way. Use a soft brush, damp cloth, or vacuum with care around the floor of the oven if appropriate. If the debris is loose and charred, removal first makes the whole process easier. Less muck, less smear.
3) Remove racks and trays where possible
Racks usually need a separate treatment because grease tends to cake around the bars and corners. Soak them in warm water with a mild degreasing solution if your sink is large enough, or treat them in a bath lined with towels to avoid scratching. For badly burned-on spots, patience is better than force.
4) Apply a safe cleaner
Choose a cleaner suited to oven interiors. Mild alkaline sprays, non-caustic oven cleaners, or a paste made for kitchen grease can work well. Apply lightly and evenly. Do not flood the oven. More product does not equal better cleaning; it often just means more wiping later.
Let the product sit for the recommended dwell time. This is where the work happens. If the label says ten minutes, give it ten. If it says longer, plan for longer. Rushing here is the classic mistake.
5) Use a non-scratch pad or cloth
After the grease softens, work gently with a microfiber cloth, sponge, or non-abrasive pad. Focus on one section at a time. In our experience, small circular motions often work better than aggressive straight-line scrubbing because you stay in control and avoid pushing grime into corners.
6) Tackle stubborn patches with a repeat pass
For the truly baked-on bits, repeat the cleaner and dwell time rather than escalating straight to harsh tools. If needed, use a plastic scraper designed for delicate surfaces. Be careful near seals, vents, and glass edges. Those are the parts people nick by accident.
7) Wipe down with clean water
Any residue left behind can smoke when the oven heats up again. Wipe all treated areas with a clean damp cloth several times if needed. Change the water when it gets greasy. A clean rinse is not the glamorous part, but it is the part that prevents surprises later.
8) Dry fully and reassemble
Dry the oven cavity, racks, and door glass before turning the oven back on. Replace trays and shelves only once everything is dry. Then run the oven briefly on a low setting if your manufacturer permits, just to make sure any remaining moisture disappears.
9) Clean the exterior touchpoints too
Handles, knobs, and control panels often collect a greasy film. A quick wipe with a slightly damp cloth and mild cleaner finishes the job nicely. It is a small detail, but it changes how the whole kitchen feels.
Quick step order
- Cool the oven completely
- Remove loose debris and racks
- Apply a safe cleaner
- Allow dwell time
- Wipe with a non-scratch pad
- Repeat on stubborn spots
- Rinse away residue
- Dry and reassemble
Expert Tips for Better Results
Small adjustments make a surprisingly big difference here. These are the things that tend to separate a decent clean from a genuinely good one.
- Work in sections. A full oven is easier to manage when you divide it into top, sides, floor, and door glass.
- Use warm water for the rinse cloth. It helps lift grease more effectively than cold water.
- Lay towels under removed racks. It keeps the sink area tidier and avoids metal-on-ceramic scratches.
- Test a discreet area first. Especially if the oven has a special coating or older finish.
- Keep ventilation going. Open a window or use extraction where possible. Even safe products are nicer to work with when the air is moving.
- Repeat the light clean before build-up gets heavy. A small weekly wipe beats a quarterly battle. Easy to say, harder to do, but it saves time.
One practical habit that helps a lot: after roasting anything likely to splatter, give the oven door and the surrounding area a quick wipe once it has cooled. A two-minute clean now can spare you a full weekend job later.
And yes, sometimes the inside of an oven looks worse at 8am than it did the night before. Grease has a way of becoming more dramatic when you are not in the mood for it.
Common Mistakes to Avoid
Most oven-cleaning problems come from being too aggressive or too impatient. That is the honest version.
- Using wire wool or metal scourers on enamel or glass. They can leave permanent marks.
- Mixing cleaning chemicals. This is never worth the risk, even if someone online swears by it.
- Spraying too much product. Excess cleaner is harder to rinse and can leave residue.
- Cleaning a hot oven with the wrong product. Heat can intensify fumes or damage surfaces.
- Ignoring the door seal and vents. These are easy to miss and often hold the worst grime.
- Skipping the rinse. Residue left behind can smell or smoke later.
- Assuming self-cleaning means no maintenance. It does not. Not really.
Another common issue is using one strong attempt and giving up when the first pass does not remove everything. Baked-on grease often needs a second round. That is normal. No need to make it a moral failing.
Tools, Resources and Recommendations
You do not need a cupboard full of specialist gear. A sensible kit is usually enough.
| Tool | Best use | Why it helps |
|---|---|---|
| Microfiber cloths | Wiping and final rinse | Good at lifting grease without scratching |
| Non-abrasive sponge | General scrubbing | Useful on enamel and glass when used gently |
| Plastic scraper | Stubborn deposits | Helps lift hardened residue without metal damage |
| Bucket or bowl | Rinse water | Lets you refresh cloths as they get dirty |
| Rubber gloves | Hand protection | Better grip and less skin contact with cleaner |
| Old towels | Protecting surfaces | Useful under racks and for spill control |
If you want a broader reset across the kitchen or home, a professional service can be worth considering. For example, oven cleaning services may be a sensible option when the grease is heavy, the oven is expensive, or you simply do not want to spend your Saturday wrestling with burnt-on splatter. For wider household upkeep, one-off cleaning is often the sort of reset people call for before visitors, moving day, or after a particularly busy season.
If you are comparing service options, it can also help to review a company's approach to safety and reassurance, such as its health and safety policy and insurance and safety information. That is especially sensible for anyone letting a cleaner work in a busy home or managed property.
Law, Compliance, Standards, or Best Practice
For home users, oven cleaning is usually a practical maintenance task rather than a regulated procedure. Still, good practice matters. If you are using commercial cleaning products, follow the label directions carefully and avoid combining products unless the instructions specifically allow it. That is basic, but worth saying because kitchen cleaning is one of those areas where "it'll be fine" can become "why does the room smell like a chemistry set?"
From a landlord, letting-agent, or property-management perspective, the key standard is usually cleanliness, safety, and handover readiness rather than a specific legal cleaning method. In rented homes across the UK, an oven should be left in a condition that is reasonably clean for the tenancy terms and inventory expectations. Exact requirements can vary, so it is sensible to document the condition before and after cleaning where needed.
For professionals and domestic users alike, best practice includes:
- reading manufacturer instructions before using cleaners or steam
- keeping the area ventilated
- wearing gloves if skin sensitivity is a concern
- ensuring all residues are removed before switching the oven back on
- storing chemicals safely away from children and pets
If the grease build-up has come from repeated heavy use, poor ventilation, or a larger hygiene issue, it may be worth looking at broader cleaning routines too. A well-kept oven is usually part of a well-kept kitchen, not a standalone miracle.
Options, Methods, or Comparison Table
Not every oven or grease problem needs the same method. Here is a simple comparison to help you choose.
| Method | Best for | Pros | Watch out for |
|---|---|---|---|
| Mild degreasing spray | Light to moderate grease | Easy, fast, low fuss | May need repeat applications on heavy build-up |
| Baking soda paste | Stubborn patches on safe surfaces | Gentle, controllable, inexpensive | Requires time and careful rinsing |
| Steam-assisted cleaning | Loosening dried residue | Helps soften grime before wiping | Not enough on its own for very baked-on spots |
| Non-caustic oven cleaner | Moderate to heavy grease | Stronger action without the harshest fumes | Needs correct dwell time and good ventilation |
| Professional oven clean | Very heavy build-up or time-poor households | Convenient, thorough, less effort on your part | Costs more than DIY |
If you are deciding between DIY and hiring help, ask yourself two simple questions: how bad is the build-up, and how much time do I realistically have? If the answer to either is "quite a lot," a pro clean can be a sensible choice. If the answer is "not too bad, and I can spend an hour on it," DIY is often enough.
Case Study or Real-World Example
A fairly typical example: a family in south west London had an oven that looked fine from a distance but gave off a burnt smell every time it was used. The shelves were marked, the door glass was cloudy, and the roof of the oven had a sticky patch near the fan cover. Nothing catastrophic, but irritating. You know the type.
Rather than going straight in with a harsh abrasive pad, they removed the racks, applied a non-caustic cleaner, left it to dwell, and cleaned the interior in sections. The first pass lifted the lighter residue. The second pass, after a fresh application, handled the stubborn spots around the fan area and door edge. They rinsed carefully, dried everything, and ran the oven briefly once it was reassembled.
The result was simple but noticeable: the smell disappeared, the glass became readable again, and the oven stopped looking like a small disaster each time the door opened. Not glamorous, but a real quality-of-life improvement. That is the thing with oven cleaning. It is rarely thrilling, yet when it is done properly, you feel it every time you cook.
If the oven is only one part of a bigger clean, some households combine it with spring cleaning or after builders cleaning when dust and residue have settled around the kitchen during works. It all depends on the bigger picture.
Practical Checklist
Use this quick checklist before, during, and after cleaning. It keeps the job tidy and stops you missing the awkward bits.
- Oven switched off and fully cooled
- Windows open or ventilation on
- Racks and trays removed
- Loose crumbs and debris cleared
- Safe cleaner selected for the surface type
- Cleaner applied evenly, not heavily
- Correct dwell time allowed
- Non-scratch cloth or sponge used
- Stubborn patches treated with repeat pass
- Residue wiped away with clean water
- Door glass, seals, and controls wiped down
- All parts dried before reassembly
- Oven tested briefly after cleaning if suitable
Practical tip: keep one cloth for loosening grime and a second clean cloth for the final wipe. It sounds small, but it stops you redistributing grease right back where you took it from.
Conclusion
Removing baked-on oven grease does not have to be a brutal, all-day battle. With safe cleaning methods, a bit of patience, and the right tools, you can get a genuinely clean result without damaging the oven or filling the kitchen with harsh fumes. The main thing is to work with the grease, not against it: soften it, lift it, rinse it, and let the finish survive another year of Sunday roasts and weeknight suppers.
If you are dealing with a light build-up, a careful DIY clean is often enough. If the residue is heavy, the oven is awkward, or you simply want it handled properly, a professional service can save time and hassle. Either way, a clean oven makes the whole kitchen feel better. A small thing, maybe. But one you notice every time the door opens.
Get a free quote today and see how much you can save.
Frequently Asked Questions
What is the safest way to remove baked-on oven grease?
The safest method is usually a non-caustic cleaner, enough dwell time to soften the grease, and non-scratch tools for removal. Always rinse away residue fully before using the oven again.
Can I use baking soda and vinegar on oven grease?
Yes, many people use baking soda paste for gentle degreasing, but vinegar is not a magic fix for heavy baked-on residue. It can help with wiping and residue removal, though the real work still comes from patience and scrubbing lightly.
How long should I leave oven cleaner on baked-on grease?
It depends on the product and the amount of build-up. Follow the label exactly. If the grease is thick, a second application with full dwell time is usually better than scrubbing harder the first time.
Is it okay to use a razor blade or metal scraper inside the oven?
Not usually. Metal blades can scratch enamel, glass, and seals. A plastic scraper designed for delicate surfaces is the safer choice for stubborn spots.
Why does my oven still smell after cleaning?
Most often, there is still cleaner residue or hidden grease in corners, seals, or around the fan. Wipe the oven again with clean water, dry it well, and check the edges and vents.
How often should I clean baked-on grease from my oven?
Light wipes after messy cooking help a lot, but a deeper clean is usually needed every so often depending on use. Busy family ovens need attention sooner than ovens that are rarely used.
Can self-cleaning ovens still get grease build-up?
Yes. Self-cleaning functions help, but they do not remove every kind of residue, especially around the door, shelves, and corners. Regular maintenance still matters.
What should I avoid when cleaning oven grease?
Avoid mixing chemicals, using metal scourers on delicate surfaces, spraying too much cleaner, and switching the oven back on before it is fully rinsed and dry.
Is professional oven cleaning worth it?
It can be worth it if the build-up is severe, the oven is large or high-end, or you simply do not have the time. A professional clean is often the easier route when the job feels larger than a normal kitchen tidy.
Will oven grease removal damage the oven finish?
It can, if you use harsh abrasives, strong chemicals, or the wrong tools. That is why safe methods matter so much. The right approach removes grime while protecting the finish.
Can I clean oven racks in the same way as the oven interior?
Usually not. Racks can often handle a more direct soak or scrub, but they still should not be attacked with abrasive pads that could damage the surface. Separate them and treat them on their own terms.
What is the best first step if the grease is very thick?
Start by removing loose debris, then soften the grease with a suitable cleaner and allow enough dwell time. Resist the urge to scrub immediately. That first soak does most of the heavy lifting.